Writing Blog Posts with Obsidian and Git

How I configured Obsidian with the Git plugin to write and synchronize my blog posts and technical documentation, with custom templates and a clean Git workflow.
![]()
Context and motivation
My technical blog runs on Docusaurus, a static site generator that uses Markdown for content. While I could edit files directly with VS Code or any text editor, I needed a writing environment better suited for writing long articles with:
- A dedicated writing interface: Obsidian offers focus mode and real-time Markdown preview
- Reusable templates: To ensure consistency of Docusaurus frontmatter (YAML metadata)
- Automatic Git synchronization: Automatic pulls every 10 minutes to fetch remote changes
- Clear separation: Only editorial content (blog, docs, images) without Docusaurus technical files
Setup architecture
The principle is simple: use Git sparse checkout to retrieve only content folders from the repository, and configure Obsidian with the Git plugin to synchronize changes on a dedicated branch.
Obsidian Vault (local)
├── blog/           ← Blog posts (FR)
├── docs/           ← Documentation (FR)
├── i18n/           ← Translations (EN)
├── static/         ← Images and assets
└── templates/      ← Local templates (not versioned)

↓ Git sync (branch "contenu")

Forgejo → GitHub → Cloudflare Pages
Publishing workflow:
- I write in Obsidian and commit manually on the
contenubranch - Automatic pull every 10 minutes to fetch remote changes
- Manual push when I want to sync with the server
- When the article is ready: Pull Request on Forgejo from
contenutomain - After merge: automatic deployment on Cloudflare Pages
Step 1: Setting up the Obsidian vault with sparse checkout
Initial clone with sparse checkout
Sparse checkout allows retrieving only the necessary folders without downloading the entire Docusaurus project (node_modules, build, etc.).
New-Item -ItemType Directory .\Obsidian
Set-Location .\Obsidian

git clone --no-checkout https://forgejo.tellserv.fr/Tellsanguis/blog_tech.git .

git sparse-checkout disable
git sparse-checkout init --cone
git sparse-checkout set blog docs i18n static
git read-tree -mu HEAD

git ls-files | Where-Object { $_ -notmatch '/' } | ForEach-Object { git update-index --assume-unchanged -- $_ }
git ls-files | Where-Object { $_ -notmatch '/' } | ForEach-Object { if (Test-Path $_) { Remove-Item -Force $_ -ErrorAction SilentlyContinue } }
git read-tree -mu HEAD

git checkout -b contenu
git push -u origin contenu
Command explanation:
git clone --no-checkout: Clones the repository without extracting filesgit sparse-checkout set blog docs i18n static: Defines folders to retrievegit ls-filescommands: Mark root files as "assume-unchanged" and remove them from the working treegit checkout -b contenu: Creates and switches to the working branch
Expected result: Only blog/, docs/, i18n/, static/ and .git/ folders are present.
Configuring .gitignore
To avoid versioning Obsidian-specific files:
# Obsidian
.obsidian/
.trash/
templates/

# System files
.DS_Store
Thumbs.db
Templates are local and personal, no need to version them in the main repository.
Step 2: Installing and configuring Obsidian
Opening the vault
- Launch Obsidian
- Open folder as vault → Select
C:\Users\Tellsanguis\Documents\Obsidian
Installing the Obsidian Git plugin
The Obsidian Git plugin allows managing Git directly from Obsidian without using the command line.
- Settings (gear icon at the bottom left) → Community plugins
- Turn on community plugins
- Browse → Search for "Obsidian Git" (by Vinzent03)
- Install → Enable
Configuring the Obsidian Git plugin
Settings → Obsidian Git:
"Automatic" section

Auto pull interval (minutes): 10 → Fetches remote changes every 10 minutes
This configuration keeps you synchronized with changes made from other machines or by other contributors.
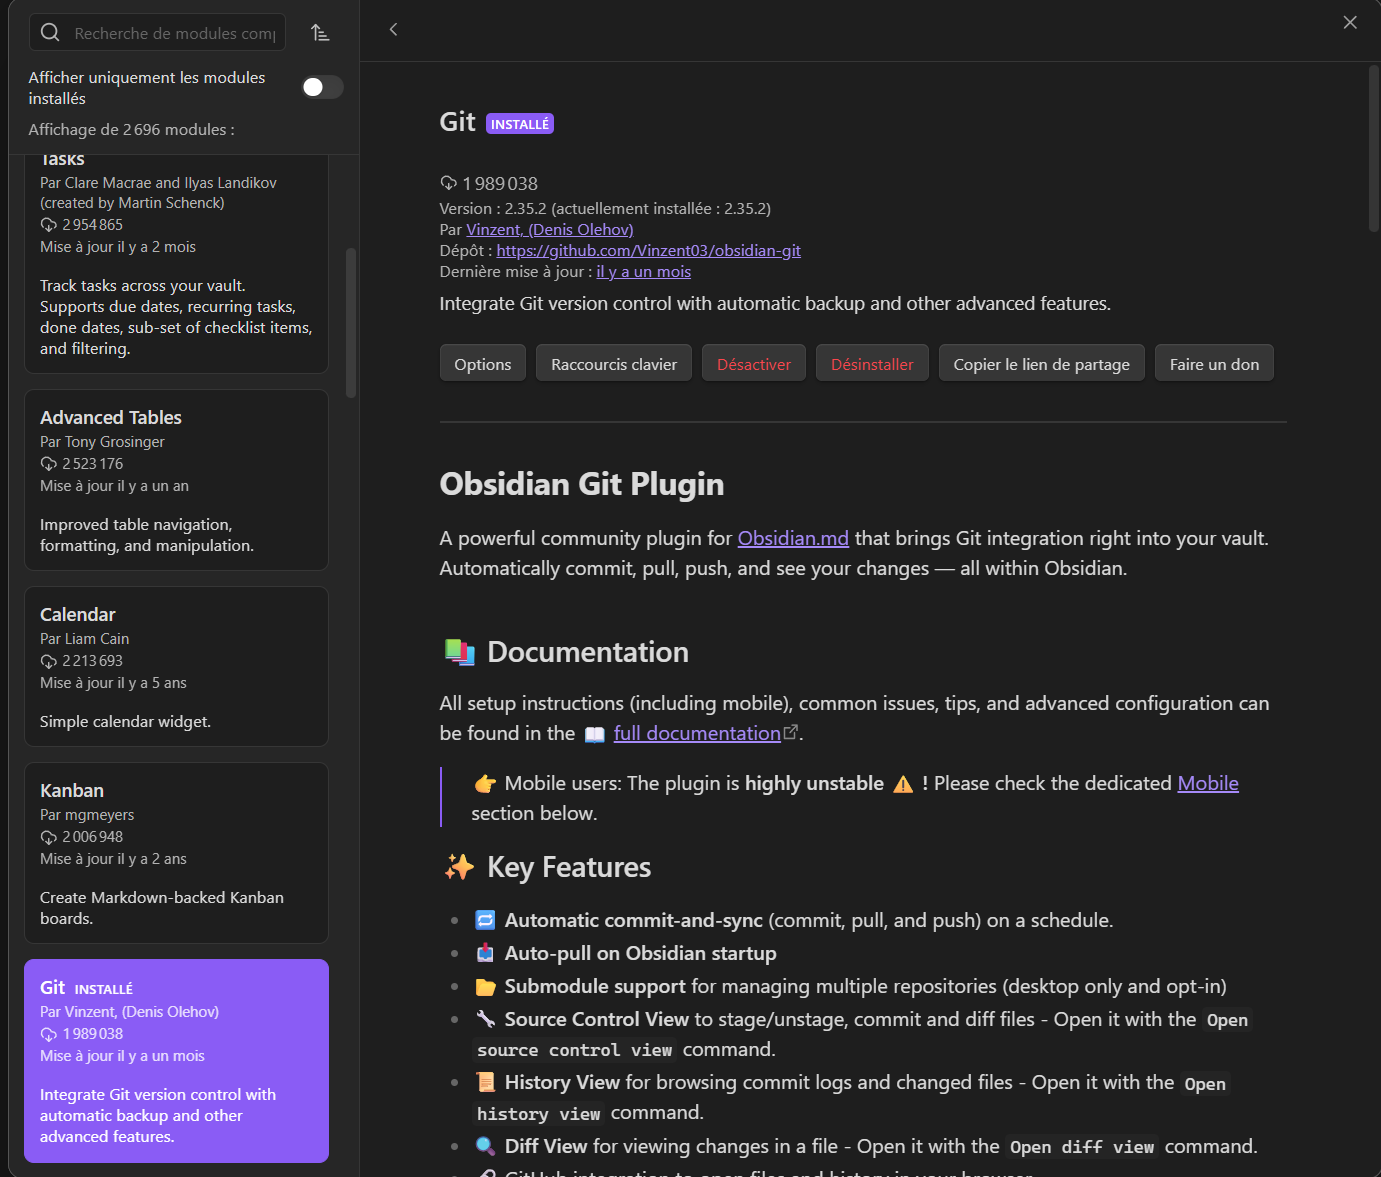
"Pull" section
Pull on startup: Enabled → Automatic pull when Obsidian startsMerge strategy: Merge → Default merge strategy
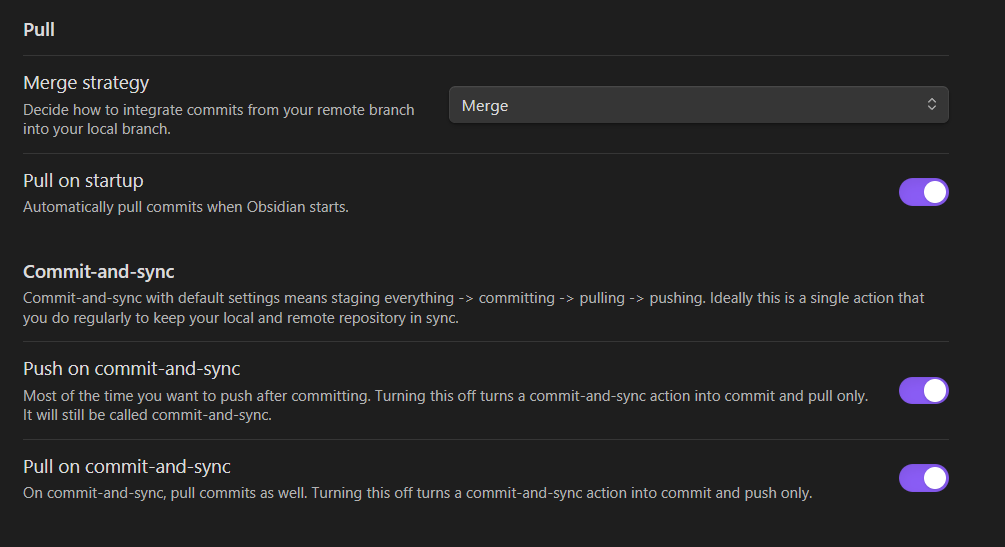
"Commit author" section
Author name for commit: TellsanguisAuthor email for commit: [email protected]
This correctly identifies the commit author in Git history.
"Commit message" section
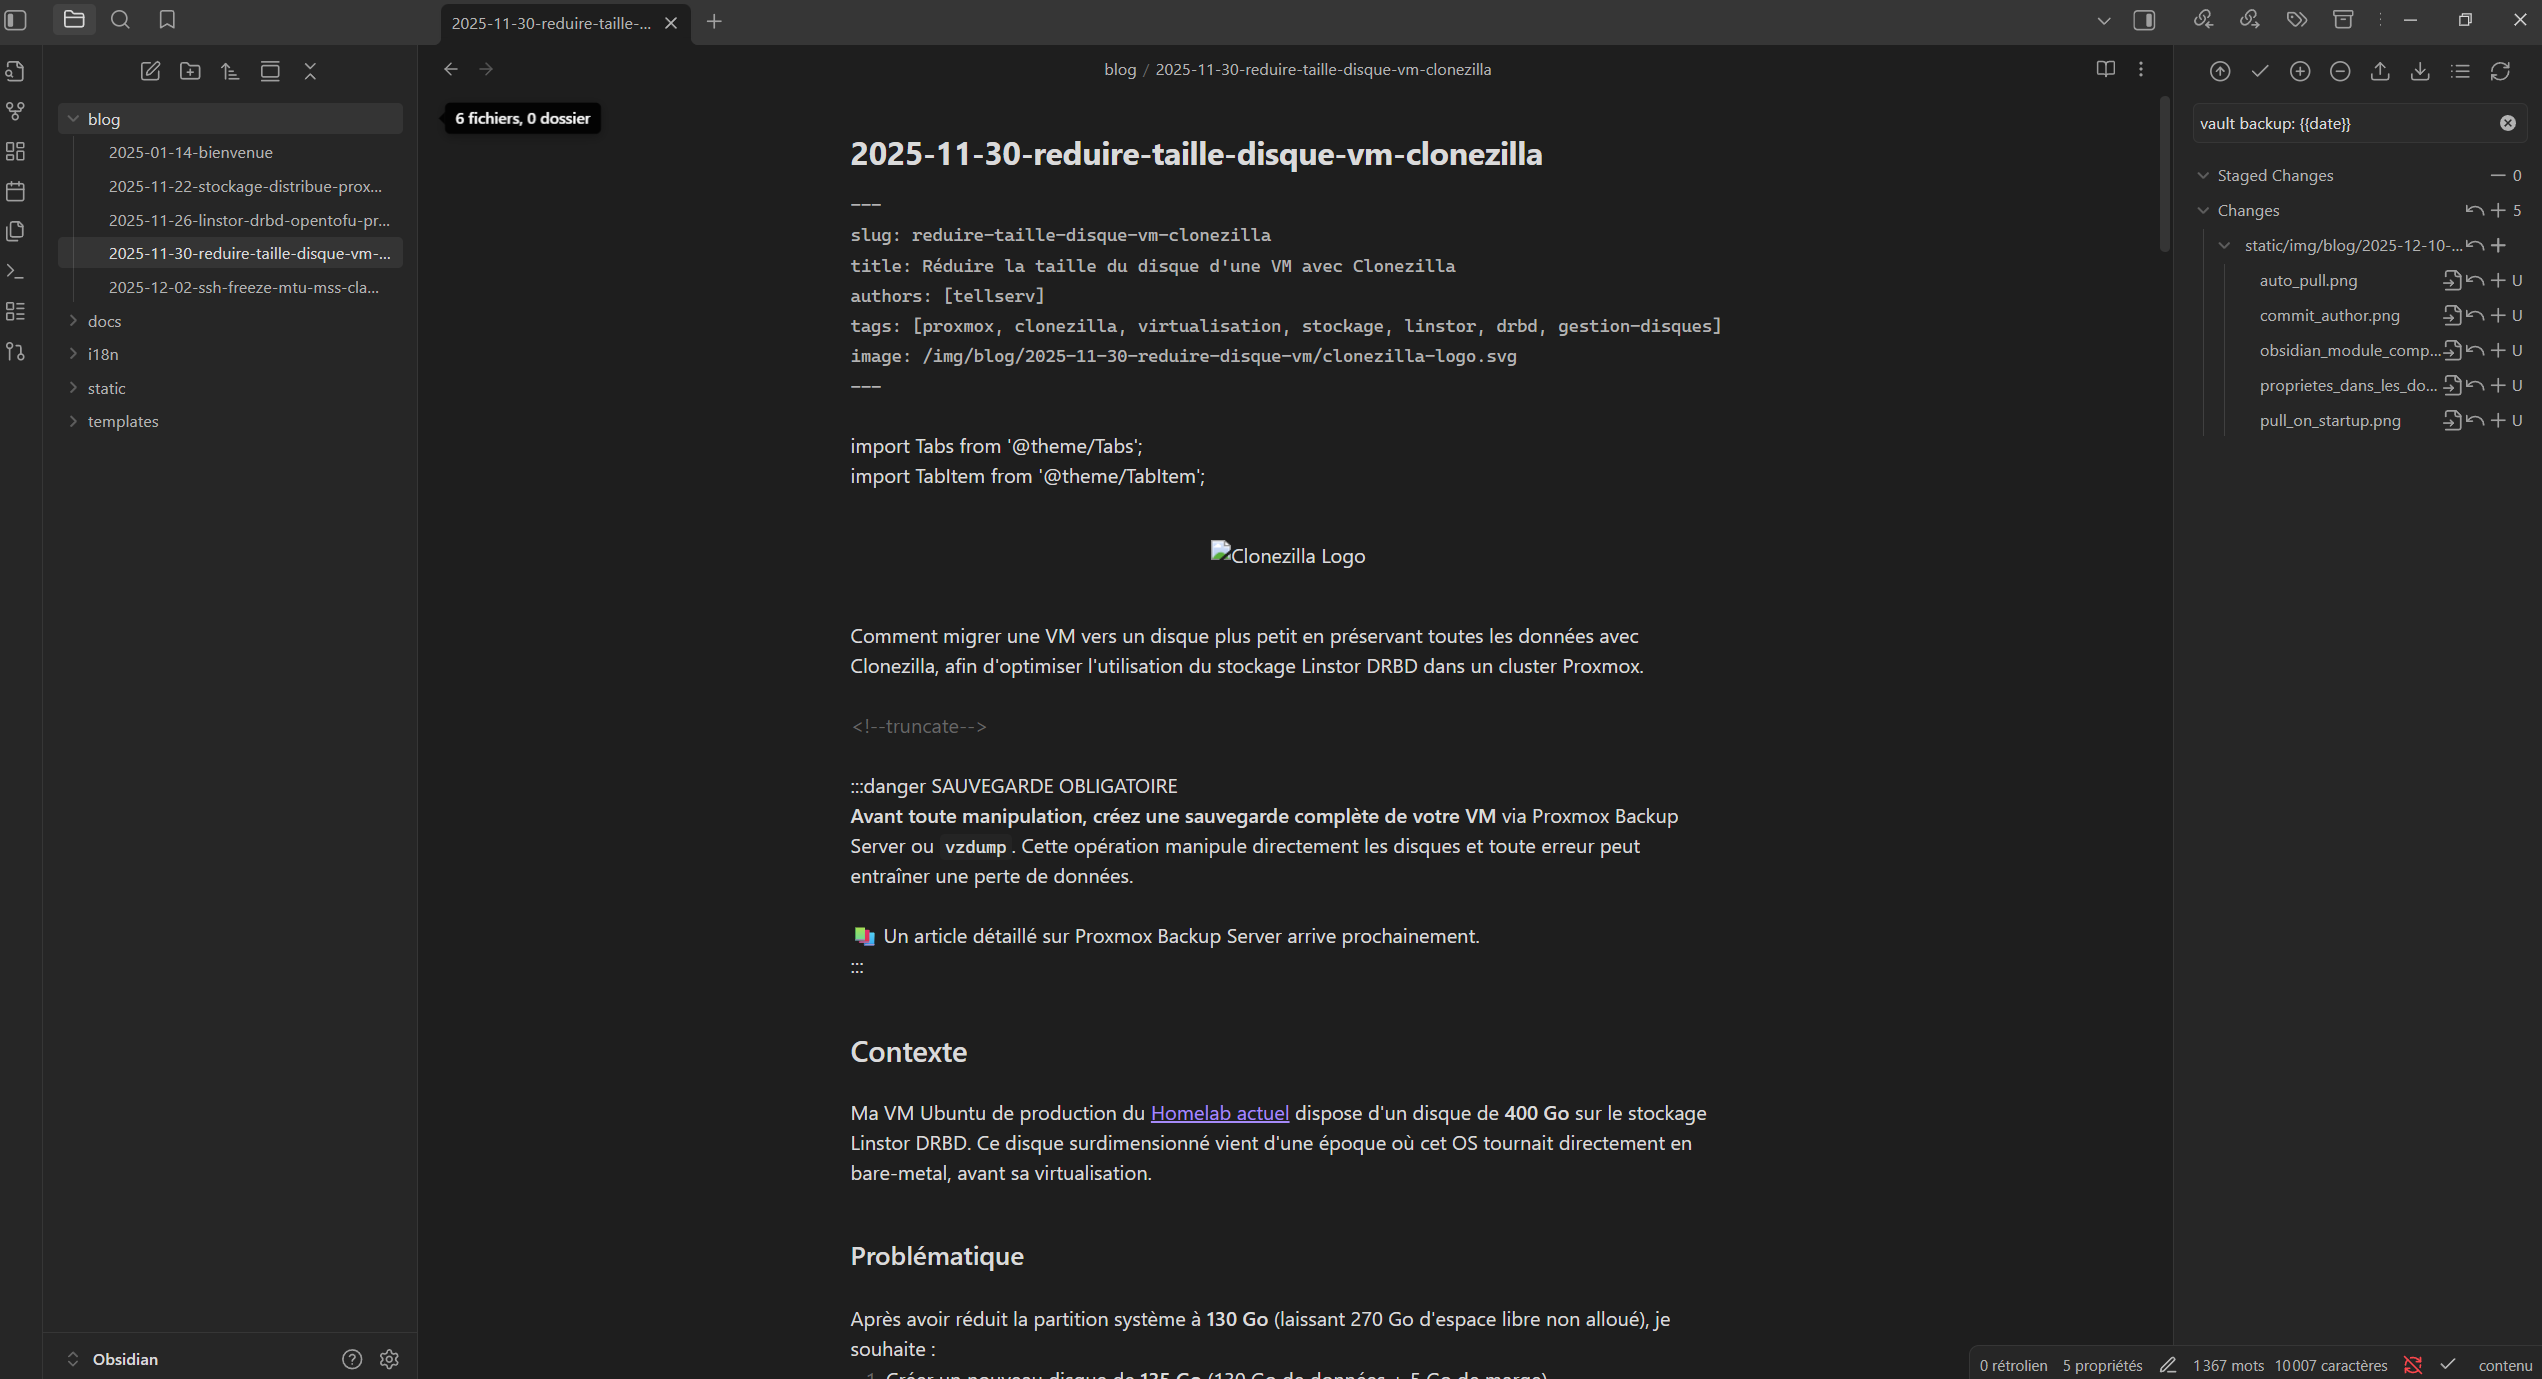
Commit message: "vault backup: {{date}}"
This syntax provides automatic commit messages with the date, for example: vault backup: 2025-12-10 14:30
Step 3: Creating templates
Templates facilitate creating articles and documentation with the correct frontmatter format expected by Docusaurus.
Configuring the Templates plugin
- Settings → Core plugins → Templates: Enable
- Settings → Templates:
Template folder location: templatesDate format: YYYY-MM-DD
Displaying frontmatter properties

To see YAML properties (frontmatter) directly in the editor, select "source" in the property display settings.
Daily workflow
Creating a new blog post
- Right-click in the
blog/folder → New note - Name:
YYYY-MM-DD-title-slug.md(e.g.,2025-12-10-my-article.md) - Insert template:
Ctrl+P(Command Palette)- Type "template"
- Select "Templates: Insert template"
- Choose
blog-cheatsheet
- Edit frontmatter:
slug: title-slug (without date)title: Full article titletags: Replace with actual tagsdate: Automatically filled by Obsidianimage: Path to banner (if used)
- Write content with real-time preview
- Add images in
static/img/blog/YYYY-MM-DD-slug/
Git synchronization
The Obsidian Git plugin displays a panel on the right side of the window to manage synchronization:
Automatic pull:
- Automatic pull every 10 minutes to fetch remote changes
- Automatic pull when Obsidian starts
Manual commit and push:
- Check changes: The Git panel displays modified files in the "Changes" section
- Commit: Click the commit button at the bottom of the panel or use
Ctrl+P→ "Git: Commit all changes" - Push: Click the push button at the bottom of the panel or use
Ctrl+P→ "Git: Push"
Publishing to the blog
- On Forgejo: https://forgejo.tellserv.fr/Tellsanguis/blog_tech
- Pull Requests → New Pull Request
- Base branch:
main/ Compare branch:contenu - Create Pull Request → Review content → Merge
- Automatic pipeline: Forgejo → GitHub mirror → Cloudflare Pages → Online publication
This workflow allows reviewing and validating content before publication, with a complete Git history of all modifications.
Conclusion
This setup allows me to benefit from a writing environment optimized for editing while maintaining a professional Git workflow with review and complete history.
The Git panel integrated directly into Obsidian greatly facilitates commit and push management, with a clear visualization of modified files. Automatic pulls ensure I always stay synchronized with the remote repository, while maintaining total control over what I commit and when I do it (in practice, I work alone on this blog: it's mainly useful for team work to have real-time updates).
If you use Docusaurus or another Markdown-based static site generator, I highly recommend this type of setup to facilitate technical content writing!