Reducing VM Disk Size with Clonezilla

![]()
How to migrate a VM to a smaller disk while preserving all data using Clonezilla, to optimize Linstor DRBD storage usage in a Proxmox cluster.
Before any manipulation, create a complete backup of your VM via Proxmox Backup Server or vzdump. This operation directly manipulates disks and any error can result in data loss.
📚 A detailed article on Proxmox Backup Server is coming soon.
Context
My production Ubuntu VM from the Current Homelab has a 400 GB disk on Linstor DRBD storage. This oversized disk comes from a time when this OS ran directly on bare-metal before virtualization.
Problem
After reducing the system partition to 130 GB (leaving 270 GB of unallocated free space), I want to:
- Create a new 135 GB disk (130 GB of data + 5 GB margin)
- Migrate the OS and data to this smaller disk
- Free up 265 GB on Linstor DRBD storage
Final Goal
Reorganize Proxmox hosts storage:
- 300 GB: Linstor DRBD (highly available replicated storage)
- 200 GB: local-lvm (non-replicated local storage)
Prerequisites
Required Tools
- Proxmox VE: Virtualization hypervisor
- Clonezilla Live ISO: Disk cloning tool (download)
- Linstor DRBD: Distributed storage (see article on Proxmox distributed storage)
Initial VM State
Before starting, check the current state:
sudo fdisk -l /dev/sda
Expected output:
- Disk
/dev/sda: 400 GiB - System partition (
/dev/sda3): ~120 GiB used - Free space: ~270 GiB unallocated
If you haven't shrunk your partition yet, use gparted or resize2fs to reduce the filesystem before starting this procedure. Leave about 5 GB margin compared to used space.
Step 1: Create the New Disk in Proxmox
In the Proxmox web interface, access your VM configuration:
- Select your VM
- Hardware tab
- Click Add → Hard Disk
New disk configuration:
- Storage:
linstor_storage(or your Linstor DRBD pool) - Disk size:
135 GiB - Bus/Device:
SCSI(scsi1)
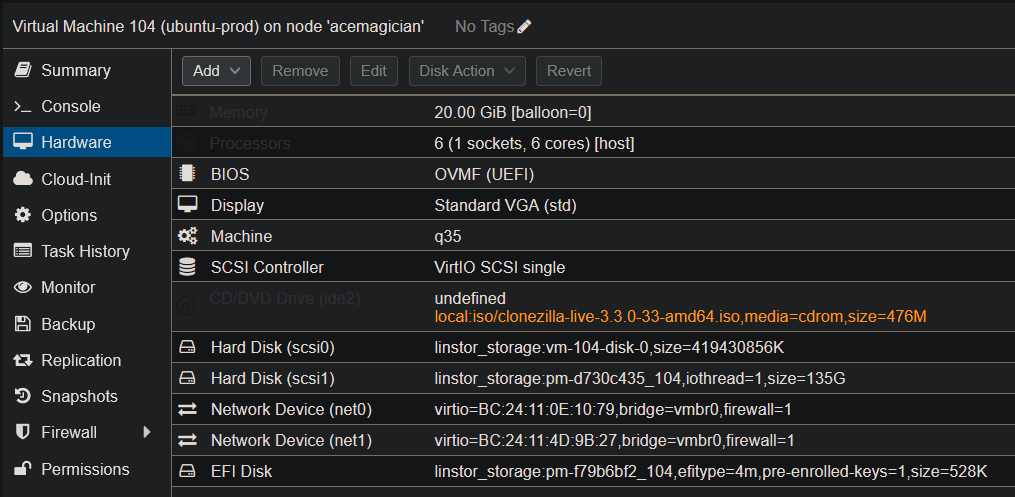
The new disk will appear as /dev/sdb in the VM. The original disk /dev/sda remains in place for now.
Step 2: Mount the Clonezilla ISO
Still in the Proxmox interface:
- Select the Hardware tab
- Double-click CD/DVD Drive
- Storage:
local(or your ISO storage) - ISO image: Select
clonezilla-live-3.3.0-33-amd64.iso
Configure boot order:
- Options tab → Boot Order
- Enable CD-ROM and place it in first position
- Click OK
Start the VM via Console → Start.
Step 3: Start Clonezilla in KVM To RAM Mode
If you don't choose the KVM To RAM option, Clonezilla display will show snow (graphical artifacts) making the interface unusable.
Boot Mode Selection
At Clonezilla boot:
- First option: Select Clonezilla live (KVM To RAM, VGA 1024x768)
- Press Enter
Clonezilla Initial Configuration
Follow the configuration wizard:
- Language
- Keyboard
- Clonezilla Mode
Choose language: [en_US.UTF-8] English
Configuring console-data: [Don't touch keymap]
(or choose your keyboard layout)
Start Clonezilla: [device-device]
Select device-device (disk to disk clone)
Step 4: Clone Disk with Expert Options
Expert Mode Selection
Mode: [Expert mode]
Choose Expert mode to access necessary advanced options.
Operation Type Choice
Expert Mode: [disk_to_local_disk]
Select disk_to_local_disk (clone local disk to local disk).
Disk Selection
- Source disk:
/dev/sda(400 GiB - old disk) - Destination disk:
/dev/sdb(135 GiB - new disk)
Warning: Selecting the wrong disk will permanently erase your data! Check disk sizes before validating.
Critical Advanced Options
Clonezilla offers several advanced options. You MUST select:
Option 1: -k0 (Create partition table proportionally)
-k, --create-partition-table
[×] -k0 Create partition table in target disk proportionally
Explanation: This option recreates the partition table while keeping original sizes of partitions (not resizing them proportionally to the new disk).
Option 2: -icds (Skip checking destination disk size)
-icds, --skip-check-dest-size
[×] -icds Skip checking destination disk size before creating partition table
Explanation: By default, Clonezilla refuses to clone to a disk smaller than the source disk. This option disables this check.
Even though the destination disk (135 GB) is smaller than the source disk (400 GB), the used partitions are only 130 GB. Clonezilla clones only the partitions, not the unallocated empty space.
The -k0 option ensures partitions keep their original size (130 GB) instead of being resized proportionally to the new disk.
Start Cloning
- Validate all options
- Clonezilla displays a summary of parameters
- Confirm with
ythen Enter - Confirm a second time to start cloning
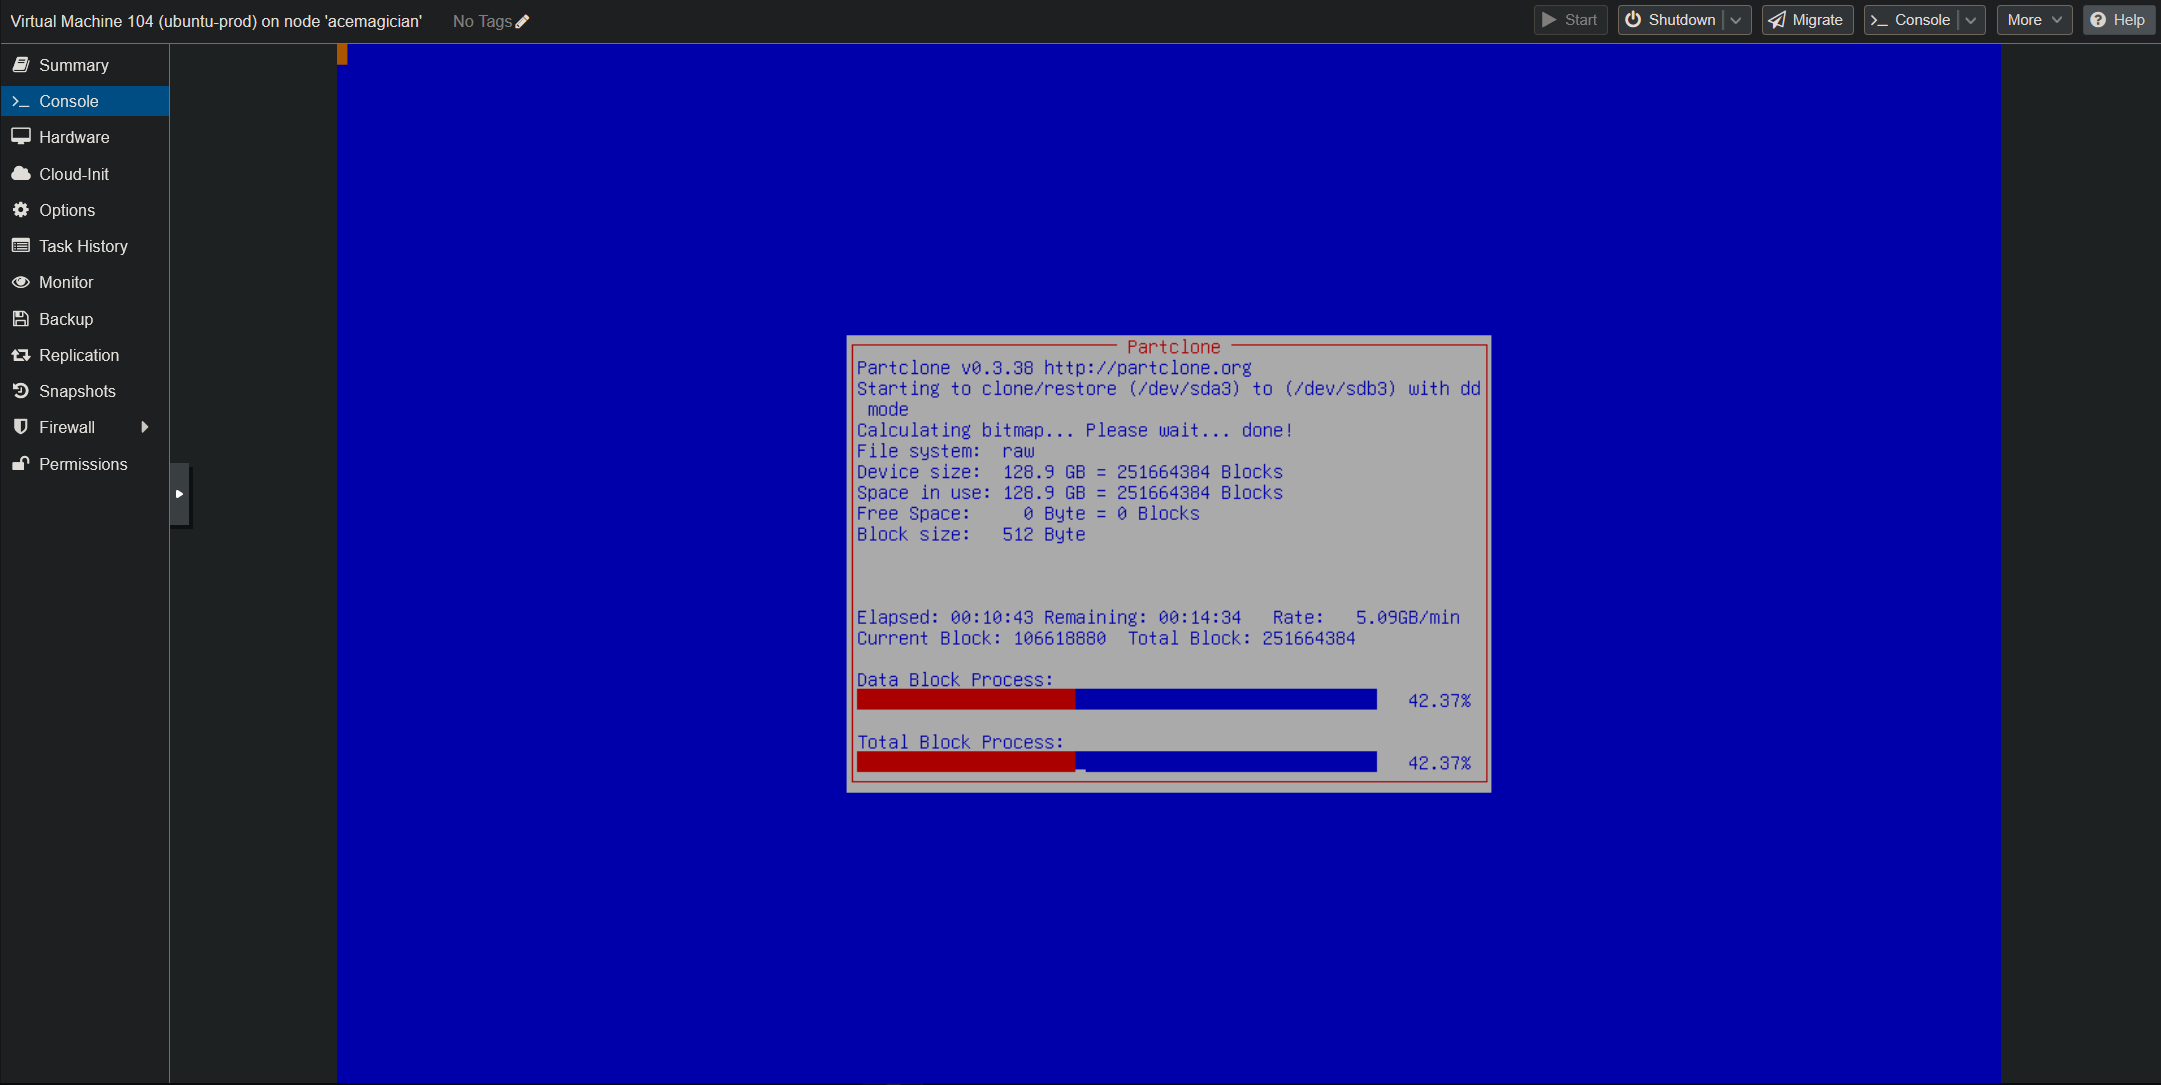
Estimated duration: Between 10 and 30 minutes depending on data amount and Linstor DRBD storage speed.
Step 5: Configure Boot on New Disk
Once cloning is complete:
- Shut down the VM via Proxmox
- Return to Hardware → Options → Boot Order
- Disable CD-ROM (or remove ISO)
- Make sure scsi1 (new 135 GB disk) is in first position
- Start the VM
Boot Verification
The VM should boot normally on the new disk. Connect and verify:
sudo fdisk -l

Checks:
/dev/sdb(new disk): 135 GiB ✅/dev/sda(old disk): 400 GiB (still present)- Identical partitions on both disks
Stability Test
Test your VM for 24-48 hours:
- Verify all services start correctly
- Test critical applications
- Monitor system logs (
journalctl -xe)
Step 6: Delete the Old Disk
Only delete the old disk after validating proper operation of the VM for at least 24 hours. In case of problems, you can roll back.
Once the VM is stabilized:
- Shut down the VM
- In Proxmox: Hardware → Select Hard Disk (scsi0) (400 GiB)
- Click Remove
- Confirm deletion
Result: 265 GB freed on Linstor DRBD storage! 🎉
My Use Case: Proxmox Storage Reorganization
In my case, this operation allowed me to free up 265 GB on Linstor DRBD storage. With this reclaimed space, I can now repartition my physical disks on Proxmox hosts to optimize storage usage:
Before
/dev/sda: 500 GiB
└── linstor_storage: 500 GiB (replicated storage)
After
/dev/sda: 500 GiB
├── linstor_storage: 300 GiB (HA replicated storage)
└── local-lvm: 200 GiB (non-replicated local storage)
This reorganization allows me to better utilize resources:
- Replicated storage (Linstor DRBD - 300 GB): For critical VMs requiring high availability
- Local storage (local-lvm - 200 GB): Primarily for my Kubernetes VMs that manage distributed storage themselves via Longhorn, as well as some test VMs/LXCs
Conclusion
Clonezilla allows efficient VM migration to a smaller disk, provided you:
- Shrink partitions beforehand to leave free space
- Use KVM To RAM mode to avoid display issues
- Enable
-k0and-icdsoptions in Expert mode
This technique allowed me to free 265 GB on my Linstor DRBD storage, optimizing Proxmox cluster resource usage and enabling more flexible storage reorganization.